Originally I was going to re create my short film that I had begun creating at the end of my Level 2 course however over the Easter holidays I realised that the idea was way to big to achieve during the time frame but also just in general, without any sort of funding or the adequate equipment I fell flat, I lost all hope in the project and my talent in film making as all my ideas were just rip offs of popular/famous films and weren’t original in anyway.
After having a long discussion with my tutor Chris Summerill, I came to the conclusion that I would best off be going back to focusing on photography, I told him how this famous YouTube Photographer challenged himself to use a film camera because due to the less amount of photographs you can take it makes you have to focus more on getting the photograph you want more than just point and shooting and taking over 100 pictures. I also told him that this YouTuber (Sawyer Hartman) also challenged himself to upload a vlog everyday to keep himself busy and keep a steady upload speed whilst also making him more experienced. This gave me an idea that I could create a short documentary of me learning to use the film camera and what I have experienced using it and how I have improved.
I shall be photographing is people in my area just going around their day to day life to try and show the different stories of the world, whether they are ugly or beautiful. We all see those people around our world where we think to ourselves, “Whats their story?” That is what I want out of this this experience, to show the people who walk among us in their daily lives and what they do with it. To show you that some people may look different on the outside to who they are on the inside. To do this I will be asking random people on the street if they would be fine with having their photograph taken for a college project before signing an agreement sheet. I will then have them go through their day, for example if they were shopping or even worked in the market they could continue doing so and I would just take photos of them while they did.
I am going to be using primarily black and white film as I have heard that there are different choices of film to use. Why I am using Black and White film is because I feel that Black and White takes away all of the emotion from an image and allows the audience to figure out the story by themselves or make up their own decisions about what is happening in the picture of what the subject is feeling for example.
Beauty and Ugly Proposal and Action Plan
Research
There is a photographer I recently found out about on Instagram who goes by the name of Yushy from Cardiff who does primarily and nearly only black and white from what I have seen on his Instagram with him only have a few coloured photographs here and there. He was documenting a Tattoo subculture and here is one of the photographs he took:
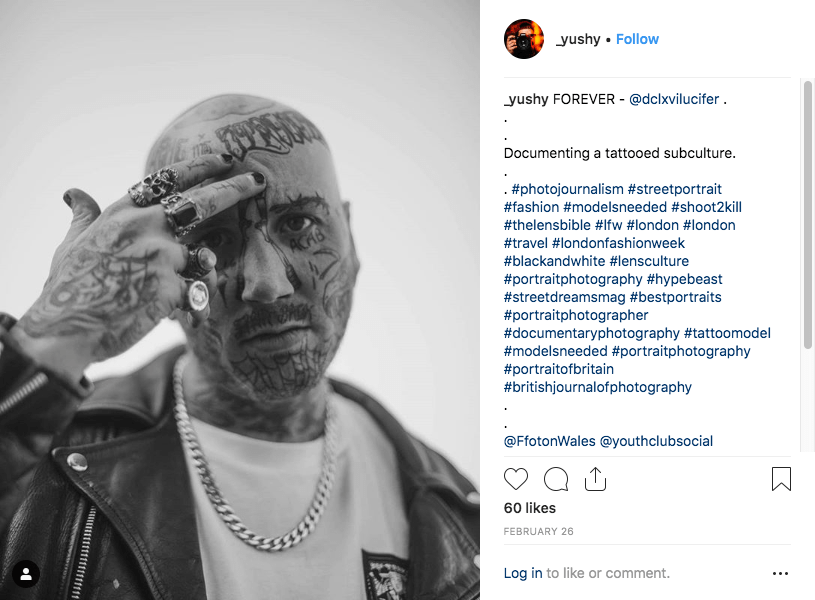
In this picture most people would think that this person is violent, with him being almost covered in tattoos, also with the photograph being black and white it gives more of a darker and serious tone to the audience. Black and White photography is mostly used for more serious photographs, but it is also an artistic style and does not always mean that everything is serious or violent, another example here of the same person:
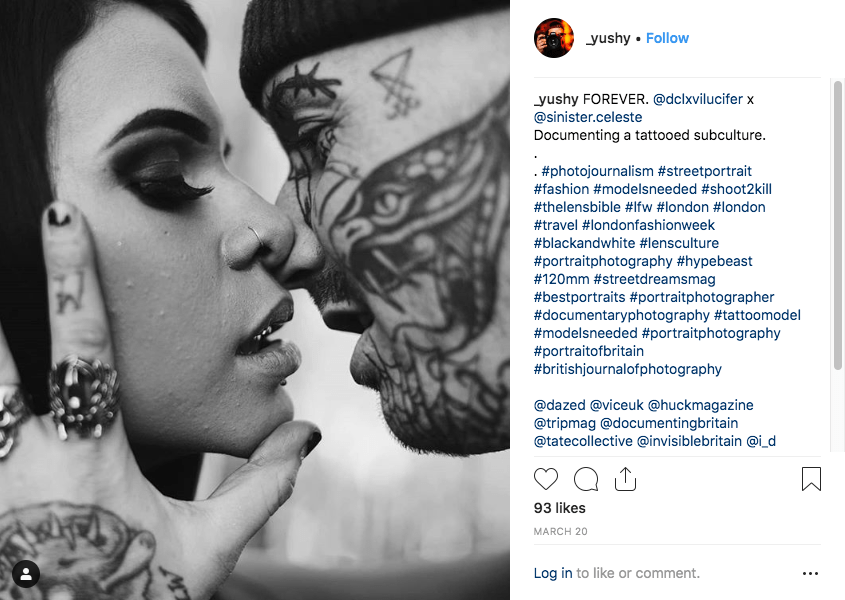
In this photograph by the same photographer (Yushy) he now has the same man (Dariusz Robertoski) from the previous photograph with a woman (she goes by the name Sinister Celeste) and they look like they are going to kiss which is completely opposite to the previous one. The other image pictured him being violent, giving the black and white colouration more of a serious effect, however with this its more romantic and loving and that the black and white colouration was just an art style. However like I said previously Black and White takes away the emotion from the scene and makes the story of the photograph up for interpretation, what do you think is happening? What does this make you feel?
2019. Instagram. [Online]. [2 May 2019]. Available from: https://www.instagram.com/_yushy/p/BuWIs_8gnhB/?hl=en
2019. Instagram. [Online]. [2 May 2019]. Available from: https://www.instagram.com/_yushy/p/BvOtYJwgJrN/?hl=en
Now I have not used a film camera, I have only used a Sony A6000 and a Canon EOS 600D which are both digital cameras.


I have been researching and found that there are many different film cameras out there such as:
Single Lens Reflex Cameras (SLR) – Single Lens Reflex Cameras are ‘the analog equivalent of the DSLR.’ The camera uses the same internal mirror mechanism that allows the viewfinder to show an nearly exact representation of what you image will look like once its been taken. A SLR camera also allows you to take of and place on different lenses for your different needs to give you more control over your shots.
Twin-Lens Reflex Cameras (TLR) – Twin-Lens Reflex camera are equipped with two lenses, one is used for viewing and the other for exposing the film. The TLR cameras allow you to continually see through the viewfinder without the ‘black out’ when the camera takes the shot which can help when taking photographs using a longer shutter speed.
Point-and-Shoot Cameras – Point-and-shoot cameras or as many people call them ‘disposable cameras’ aren’t as sophisticated as any of the other camera’s as you can not change the shutter speed, the f stop or even the lens. These cameras are mainly used by families on holiday who want to get quick photos for memories and not for art.
Instant Cameras – Instant cameras are basically the same as Point-and-Shoot cameras however you do not need to take the camera to a shop to have the pictures developed as they are created for you in the camera and are able to be seen straight after the photograph was taken.
There are many other types of film cameras however those are the most popular and well known. Now with there being many different types of film cameras out there you may think to yourself that there may be many different types of film however there are not. There is:
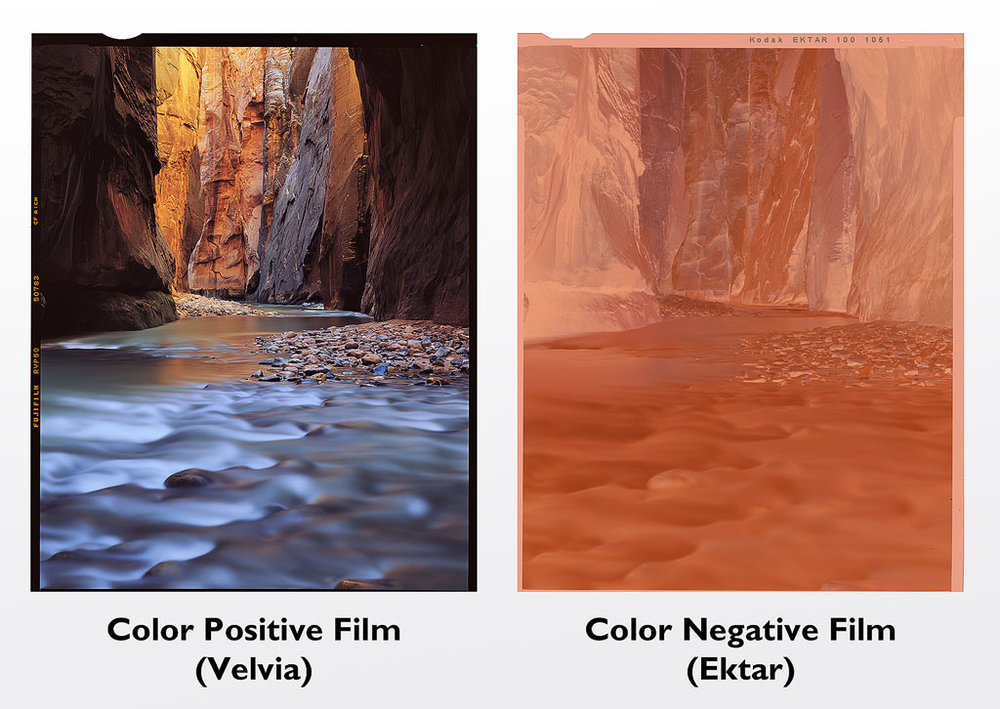
Colour Negative Film – Which is commonly used and more popular with portraits and wedding photography because of the vivid colours and the contrast the film produces.
Colour Positive Film – Colour Positive Film are used for a method called cross processing which is achieved because the chemicals that are in the colour positive film (E-6) can be used with the C-41 chemicals in the colour negative film which then creates photos with intense contrast and colours which can be seen in lomographic photos.
Black and White Film – The Black and White film has two different types. The most common type of black and white film goes by either the term traditional or Silver Gelatin. The film uses ‘gelatin with small silver salt crystals dispersed in the substance’ hence where it gets the name “Silver Gelatin.” The Silver Gelatin film is seen as being more stable and easier to develop than the other type of black film which is C-41 B&W film, this film has multiple layers which are sensitive to light however, it has a painstaking development process which can be easily messed up. Also if the film is exposed to various different colours then it can become unstable and often lead to inconsistent results.
Infared Film – This type of film can create very surreal and quirky visuals and photographs when exposed correctly however it is seen as being seen more for experienced photographers.
Common Film Sizes:
- 135 or 35mm
- 120 or Medium Format (6x6cm)
- Large format (9x12cm)
The Camera I am going to be using for this project is a Pentax K1000 with a 50mm Prime lens and two rolls of black and white film.
2019. Adoramacom. [Online]. [15 May 2019]. Available from: https://www.adorama.com/alc/what-are-the-different-types-of-film-cameras
The biggest difference I can see with Digital and Film cameras is not the image quality which there are differences of course but, its more in how you use the camera. For example when you use a digital camera, all of your photographs are stored on a SD card which essentially almost makes the amount of photographs you can take endless and you can take up to 100 photos of one subject and out of those only use 4 or even only 1. Using film cameras removes this as a roll of film only holds a certain amount of photographs which then leads you then to become more focused on what you want to capture and makes you start to get more creative to look for those photographs that mean something and are worth to be taken on the camera. Now obviously there are visual differences with digital and film, digital photos a have much larger resolution which makes them easier to be edited in programs such as Lightroom, however even though the resolution is large when you actually zoom in closer on a digital photograph you can see that the processor in the camera, for where it can’t fill in the colours accurately, it fills it in with the closest colour it thinks it can be which leads to noise and photographs which are either more of a blue colour, green, purple, yellow or orange which then cause the editor to use noise reduction which results in the subject looking smoother. This is seen mostly seen in photographs with high iso, in night shoots but it can also be seen in daylight photography. You can see this in the images I have placed below.
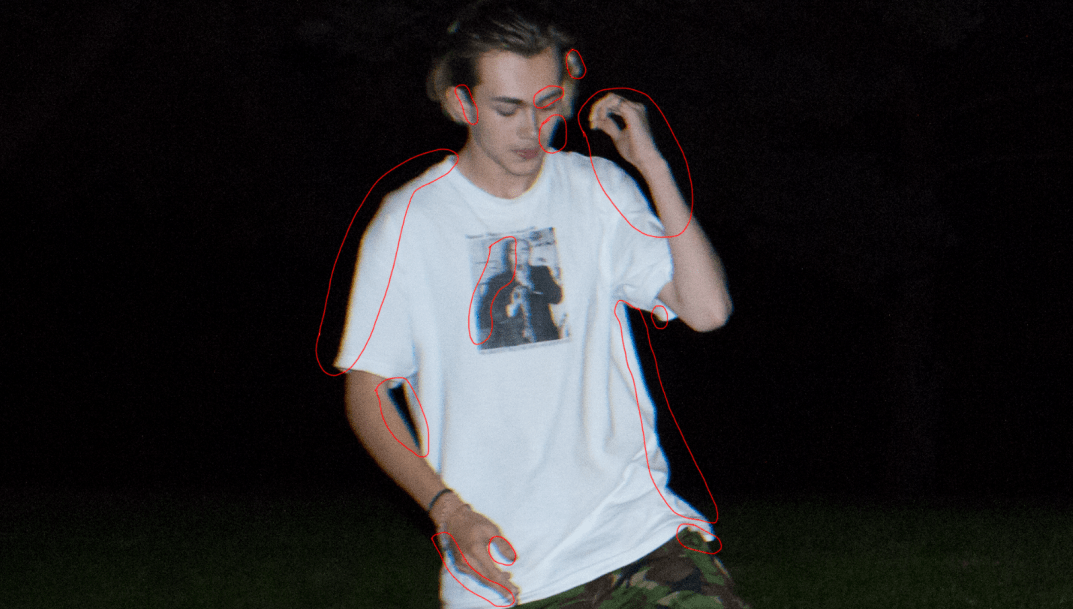
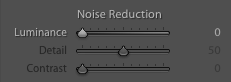


Images without Noise Reduction
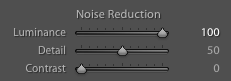

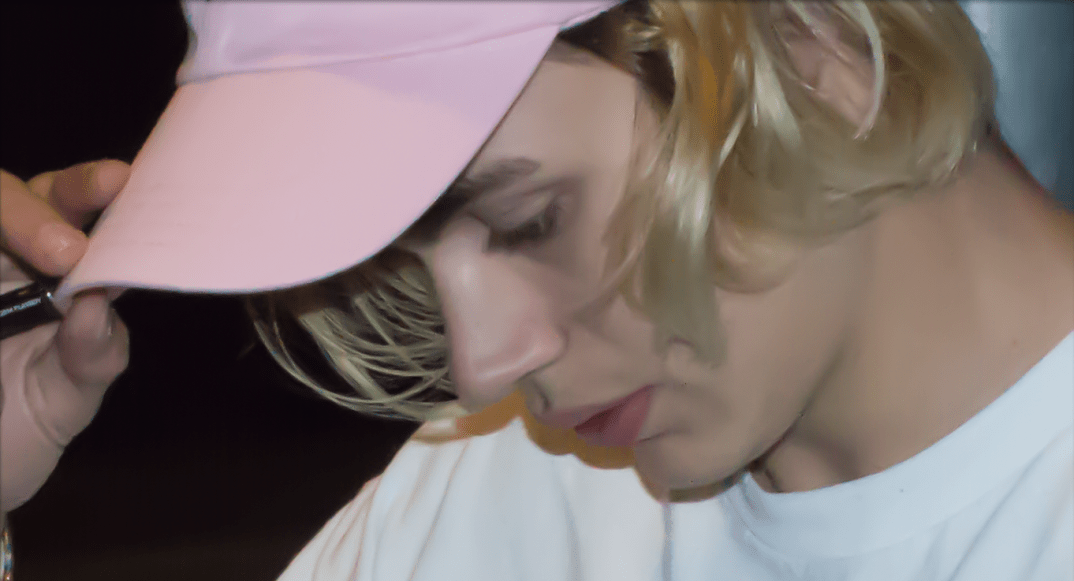
Images with noise reduction
Bad Examples of Photography:

This is a common thing you see with beginner photographers where they do not understand how shutter speed works and because of this the slightest movement as the photo is being taken causes it to become blurry and has a visual effect of it being smudged. Also the framing is all wrong in this picture, this was obviously going to be used for a profile picture however, there is too much space between the subject and I know what some of you will say, “Well maybe he wanted the mountain scenery in the background” which I will reply with, “Yes, so frame it so you have a medium close up of his face and have the mountains and water behind him, or if the mountains are that important then just take a picture of the mountains, you see your face everyday.”
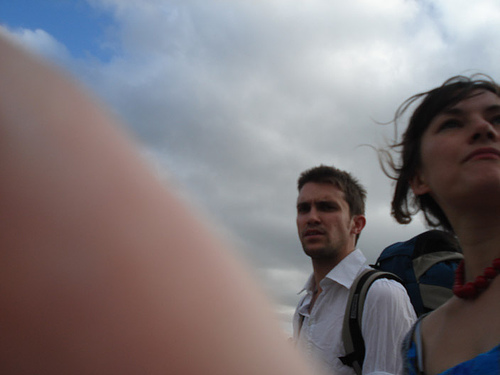
There is so much wrong here it hurts. The framing and composition are poor, one of the subjects is halfway out of the frame and her face is blurry, the highlights are very dull and its also under exposed and has low contrast. Do not even get me started on the finger covering most of the frame as I am not the only person who understands why this is a big nope, also the guys face is an accurate representation of this image, disgust, hate and wishful that they will never have to witness this appalling image… but you know he did.
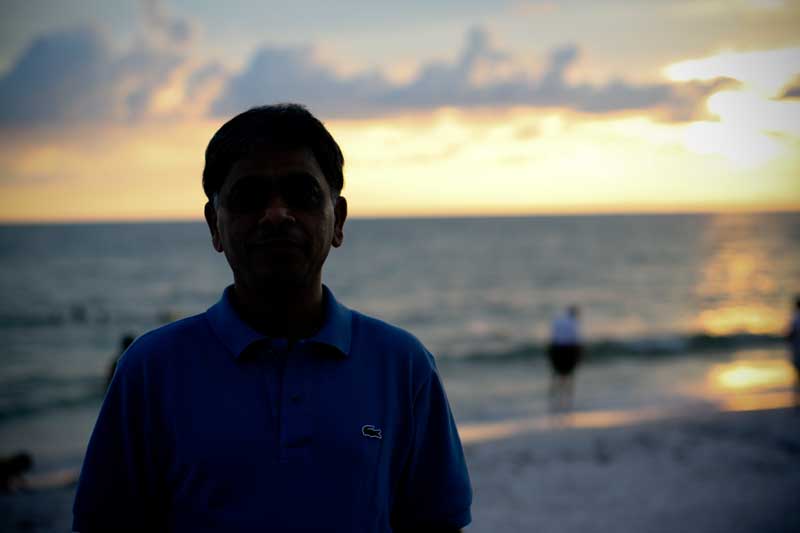
So under exposed and whoever edited this made it even worse by making the shadows even more dark, almost covering the face of the subject and making his face indistinguishable. Framing and composition is ok but it is strongly let down by the exposure and lighting.
After looking through the answered questions I found that all the people who answered my questionnaire preferred landscape photographs, this is not going to change my decision on doing portrait photography for my final piece however I will try to include some landscape photography in my final piece as I can appeal to my audience.
Pre-Production:
I was inspired to manipulate the faces of the people in these portraits from this image of Trent Reznor and Atticus Ross from their band Nine Inch Nails.
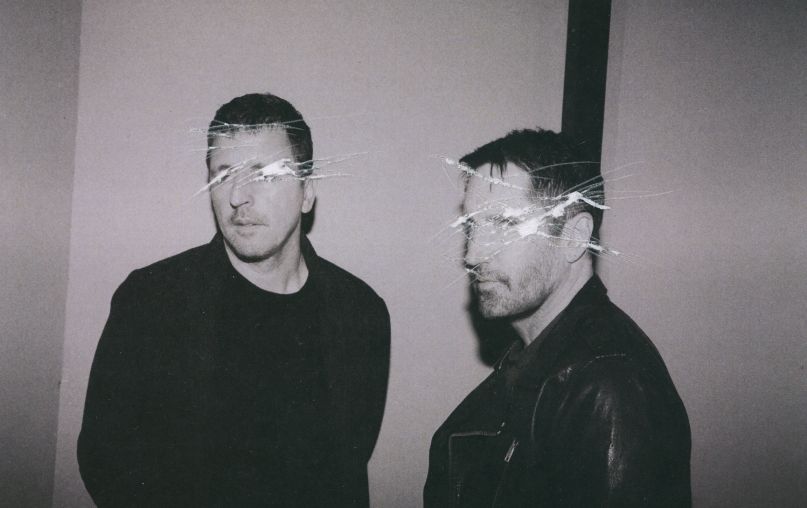
Taken Nine Inch Nails Spotify Profile
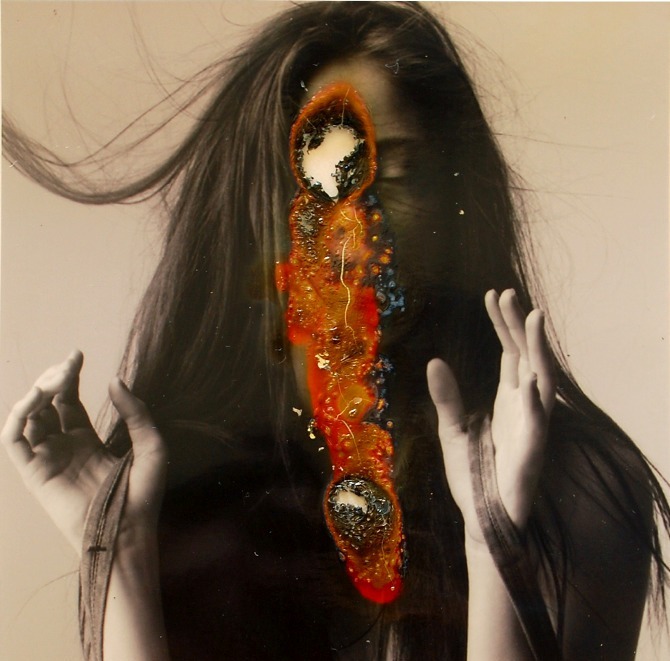
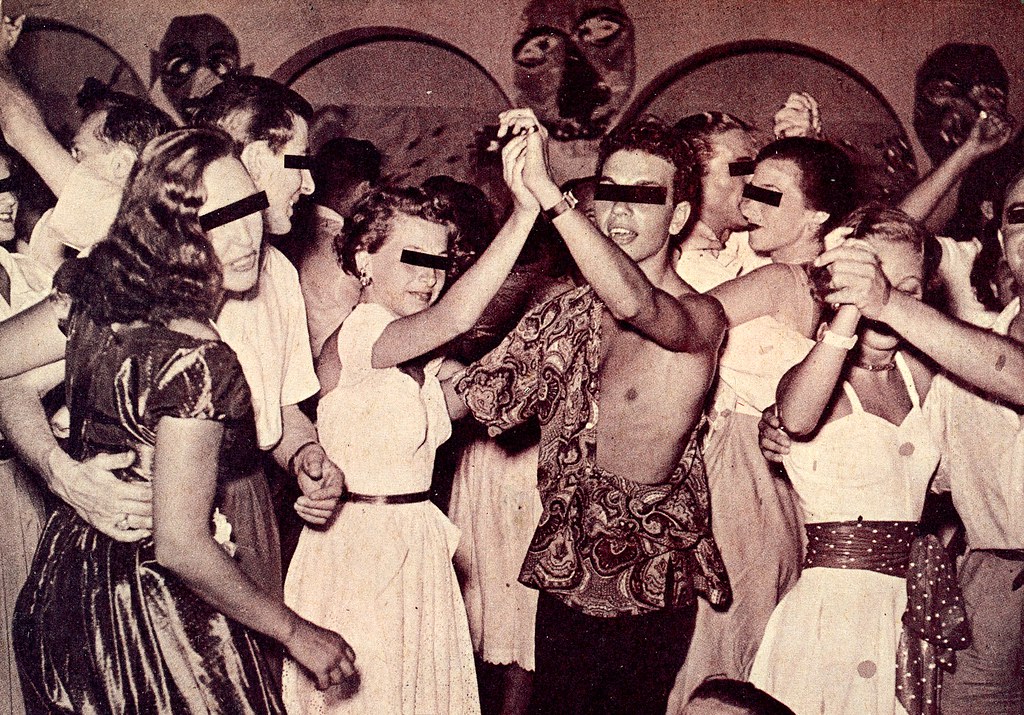
My reasoning for using the manipulation of features on the face like the eyes and mouth is because the eyes are seen as being the window to the soul and that they are both also seen as the most beautiful features of the human body. I want to remove them or at least cover them from the photographs as a way of saying that no matter whether you can see all of a persons face or none of it at all that does not give you the right to categorise them as being beautiful or ugly, everyones opinion is different and we are all just human, we can not choose what we look like, we are all born the way we are and we should be appreciative or disgusted by the way others act, not by how they look. You see it a lot with people who have an average body type and are fit, they point out overweight people and how ‘bad’ or how ‘terrible’ they look because they are not overweight themselves, if they were overweight and someone made fun of them they would feel attacked and get upset, but because they aren’t, they find it completely acceptable which is wrong.
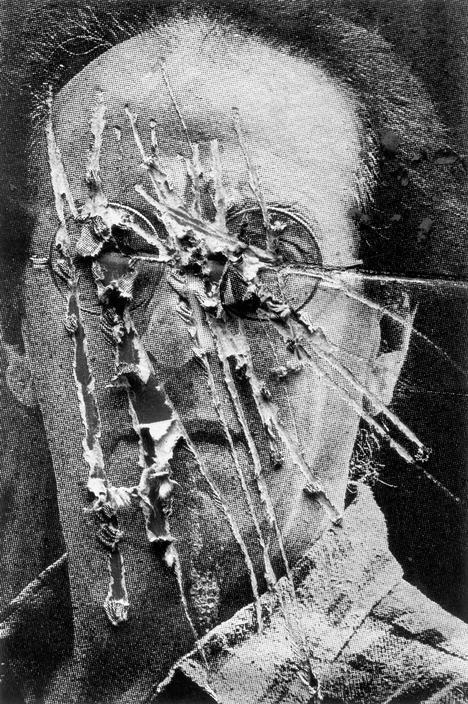
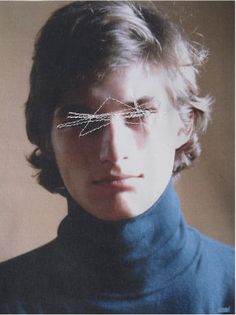
Here are more examples of manipulation to an image:
Pre – Production
When it comes to my short documentary about the process of me using the film camera, I have decided to make it very cinematic and make it more visually appealing with exposition shots with narration playing over. I want it to have an interview feel with it beginning with someone asking me questions about what I did and why, which then transitions into exposition shots of me walking around, taking photos, looking over at the developed images and more while the narration of me talking about my experience using the film camera, how I felt the developed images turned out etc.
At the end when the final piece is created and I have finished with what I have to say, I place the final piece on a wall which then snap transition to at the exhibition itself and people are walking past, looking and such where it then fades to black.
Script
“I’ve had a strong interest in photography since my early teens but it wasn’t until I recently that I found a new interest in film photography.”
“This is Sawyer Hartman, an American YouTuber and professional photographer. He was featured in a Corridor Crew video where he explains how film photography brings more creativity in your photographs due to the limitations of how many photographs can be taken on a roll of film.”
“Now without further a do, here is my journey using film for photography.”
“So my friend Martin and I went out after college and explored around our local area, we had laughs whilst we were out, made some jokes, we got scared, I got attacked by some twigs and then we stumbled upon a destroyed truck which had been torched, and then I fell into a bush.”
“Later that week we travelled to Cardiff for a 60’s to 90’s themed party and also whilst venturing up a mountain we came across what seemed to be an abandoned blue shed, however after closer inspection we realised we were on private property and decided not to photograph there.”
“Now all that was left to do was wait for them to be developed.”
“Throughout this experience I have learnt new techniques when it comes to photography and I have realised that as a photographer I should not be afraid to experiment with my craft and explore more creative techniques than just the conventional way of things.”
“Film photography is a wonderful way of capturing moments in life and is a more natural form of photography due to the images being taken not having any editing done to them what so ever, whatever you took that day will be seen in your hands when it is developed and that is amazing, to capture a moment how it is without it being altered with face tuning or over exaggerated colours is better in my eyes.”
“The choice of using Black and White film was also to allow the audience to tell the stories themselves how they saw it, without colour there is a lack of emotion which allows the audience to make their own decisions on what is really going on, leaving only the photographer, to know the truth.”
Equipment List
Canon 600D
13 – 55mm Kit Lens
Pentax K1000
50mm Prime lens
Mac Computer
Adobe Premiere Pro
Production
I am happy how the photos I took using the film camera came out, you can definitely see my progression and how my photographs became more advanced and creative in the 2nd roll of film than the first and that I was trying to actually capture a moment more than a pose in a lot of the photographs.
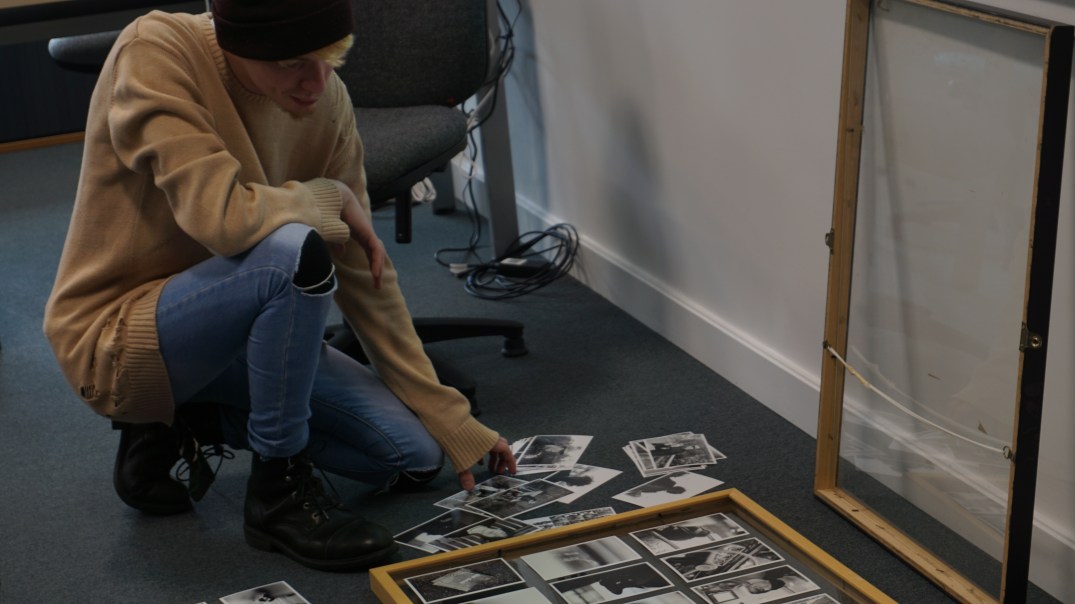
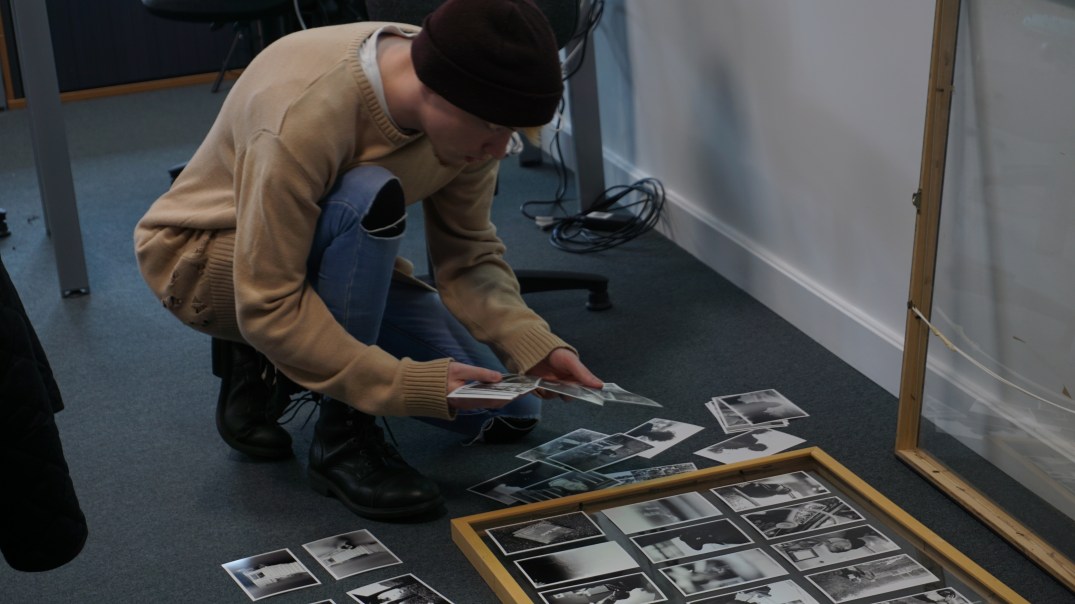
In these images (first two) I am ordering the photographs into how I want them to look in the final frame and also seeing if any other pictures can be used or swapped with others.

This Photograph shows a little of the order that I had originally planned for the photographs to be in.
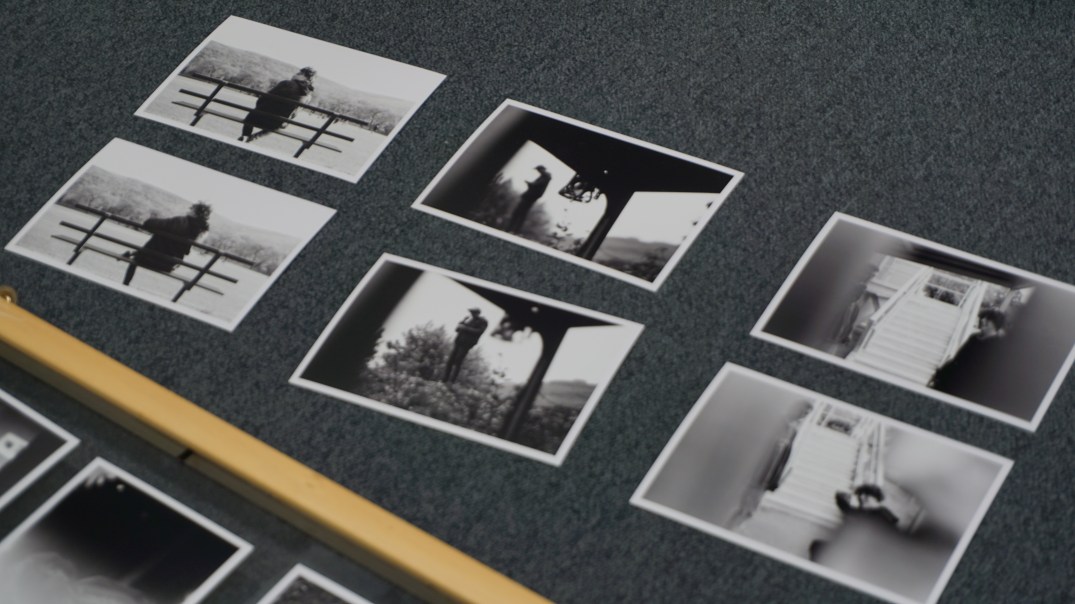
These photographs are ones that work well with each other as they both are shot in the same places with the same composition however with only small differences between them. These are also going to be displayed in the exhibition if there is enough space.
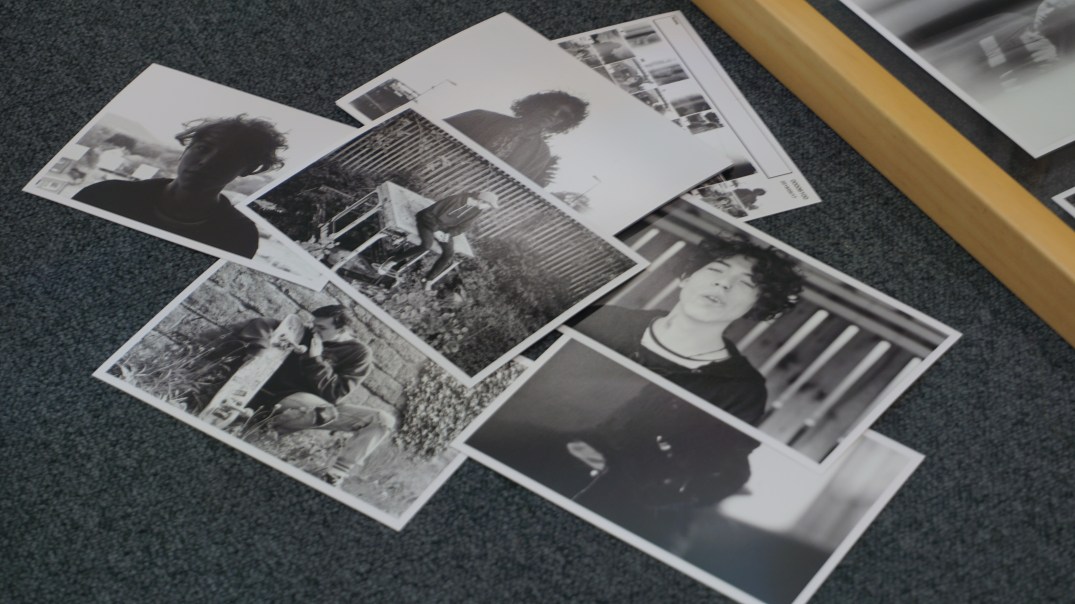
These photographs are ones that I was questioning whether they should be in or not as they seemed they also looked as they were also good enough to be in the framed piece (the photograph of the cat was added to the final frame.)
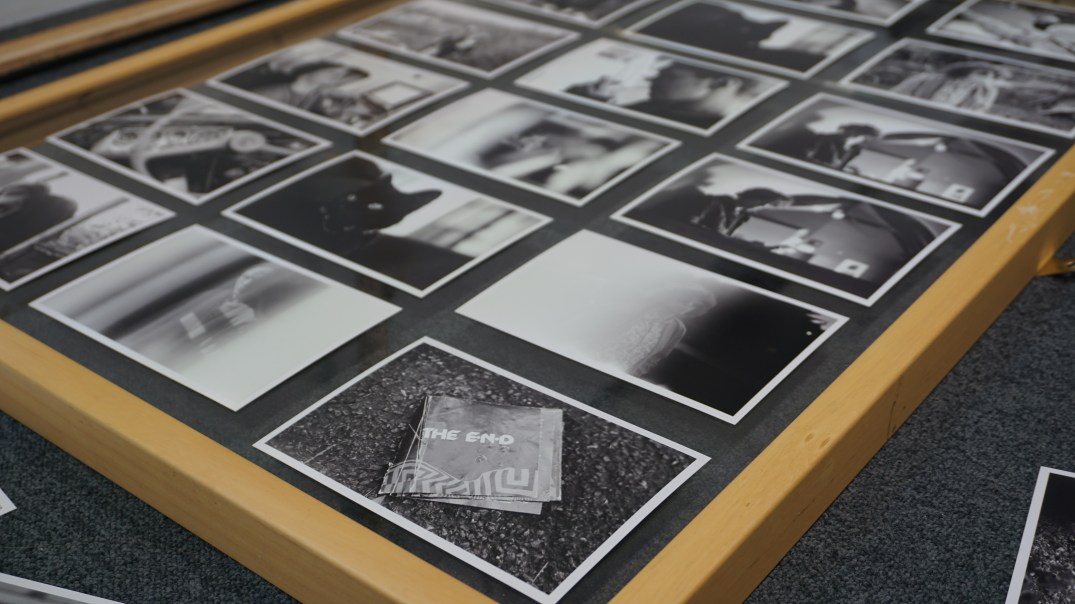
These were the photos that were at the bottom of the frame, using the photograph with the little booklet with “The End” was decided to be used at the end of the frame not long after I had taken the picture so I knew that was there to stay.
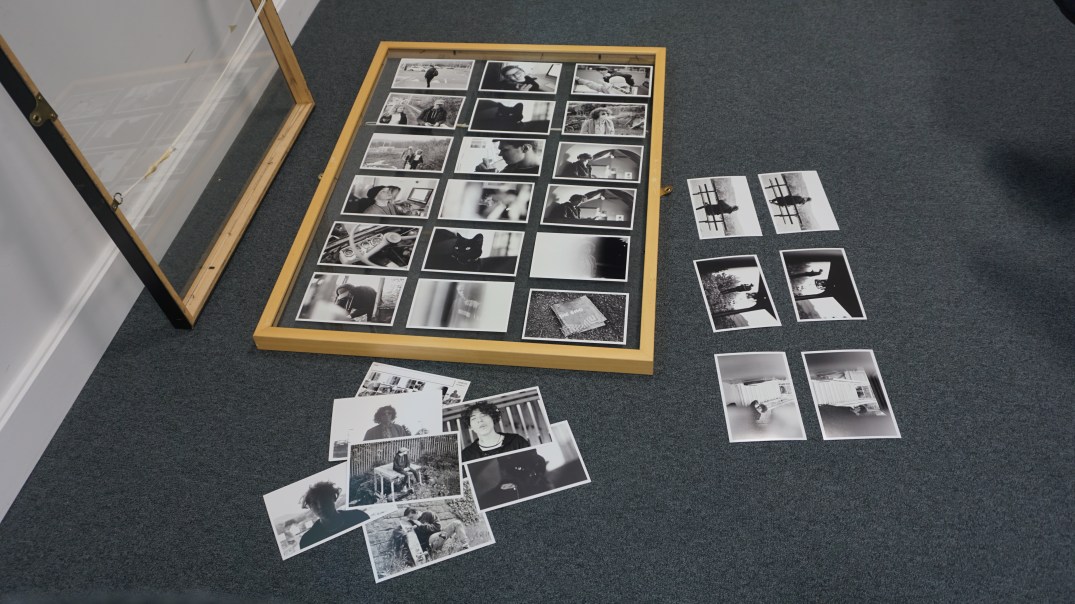
Here is the full piece with extra images at the bottom which were ones that I thought may be used and swapped with others and the photographs on the right are photographs that may be placed around the frame as extras as they work well by themselves.
Paragraph of why I ordered them as I did and the whole story thingy
Here is a screenshot of the timeline of the short documentary as seen in Premiere Pro.
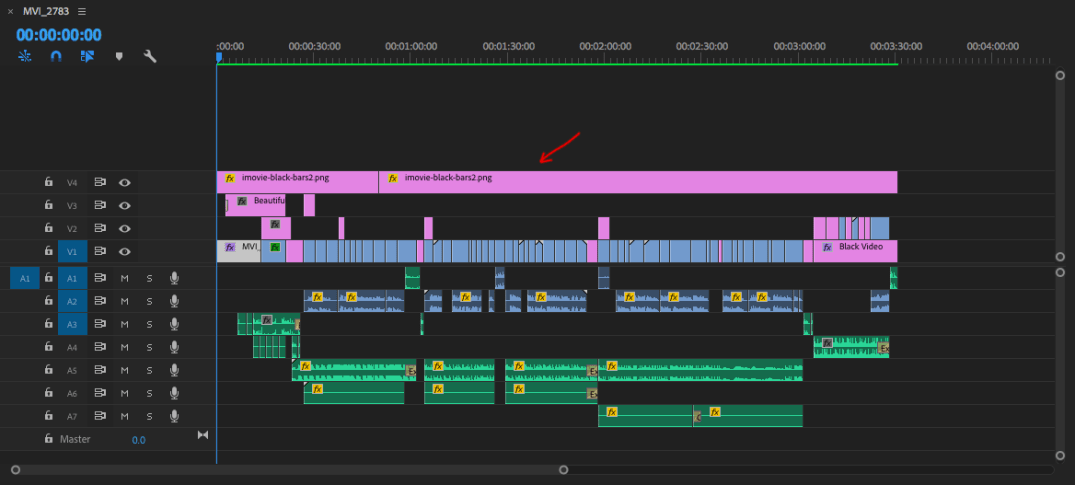
This is the cinematic bars that are overlayed over the footage I have filmed to give it a 2.35:1 aspect ratio which is seen commonly with films. I use this as I like the way it makes the final video look and helps with being able to reposition footage to help with faults during filming that could not be re done on the day.

All of these highlighted pink boxes are text that was over the footage, for example the title of the project, my name, credits etc. These were used for credit where needed, to show what this piece was called, names of certain people in piece, and in general just to give out more information needed.

The blue clips seen highlighted are all of the footage that I have taken which have been cut and placed into a certain order to have the short documentary flow to the beat of the song and to convey the correct information needed.

The green clips highlighted are audio files that has been added for certain sound effects, for example, the cassette tapes sound effects, the vinyl scratch, background music etc.
Evaluation
During this whole final project I have had good moments and bad moments.
At the beginning of this entire projects I was in the middle of creating an entirely different piece where I was going to be creating the short film I had planned to create a year prior, I had done all of the research and had begun the pre – production. During creating the script for the piece I began to realise that what I had envisioned to create was something to large of a scale for what I could achieve. After this I began to lose hope and just wanted to give up and work in a dead end job for the rest of life and become unhappy forever.
I know that went dark really quickly there however that is how I felt and that was my plan. After speaking to my college tutors however I had a change of heart and decided to go to another interest I have which is photography. I decided to take photographs using a Film Camera and document my process in a short documentary so I still had a form of cinematography in my work.
I immediately went to work as I had a lot of catching up to do and completed all of my research in a flash as I already knew a lot about photography prior to this and only had to learn about Film Cameras and how to use them. After the research side of things was completed I began taking photographs using the film camera and you can tell the difference clearly from the first to second roll of film how much I had improved and then it was time to create the short documentary to go with the photographs.
During the creation of the short documentary I began to lose focus and became lazy and it was not until it came close to the end of the course that I realised that this was important to my work and I needed it to be completed. I began filming as soon as possible and edited my short documentary together. I was unhappy with how certain things came out, I wish I had better footage in some areas, I wish the audio quality for the narration was better and how I spoke in the video all together. I do understand that all of these problems were of my doing and I have learnt now that I must put in the effort to achieve the work I want and that I must plan everything in advance and begin production as early as I can to complete the work I have in time and also having time to do any reshoots or tweaks necessary.
Overall this final project has been an eye opener for me and even though it did not turn out how I wished it did I am still grateful for the techniques I have learnt and will take all of the things I have learnt to my future projects.
